

Last Updated: 4 November 2026
Quick Summary
Reconstituting laboratory peptides means dissolving a lyophilised powder in a suitable solvent, usually bacteriostatic water, to create a solution of known concentration for research use. The protocol takes roughly 10 to 15 minutes and requires gentle swirling, never shaking, plus accurate concentration maths and correct storage.
- Let the vial reach room temperature and let the alcohol-wiped stopper dry fully before puncturing.
- Vent vacuum-sealed vials slowly and direct solvent down the vial wall, not onto the powder cake.
- Concentration equals mass divided by volume: 5 mg in 2.5 mL gives 2 mg/mL.
- Store reconstituted peptides refrigerated, protected from light, and aliquot to avoid freeze-thaw cycles.
- Cloudiness from contamination is non-recoverable; discard the vial rather than filtering and reusing it.
Table of Contents
- What Reconstituting Laboratory Peptides Actually Involves
- Materials and Equipment for Aseptic Reconstitution
- Peptide Solubility and Solvent Selection
- A Step-by-Step Reconstitution Protocol
- Using a Peptide Reconstitution Calculator
- Research Peptide Storage Guidelines After Reconstitution
- Troubleshooting Cloudy Solutions and pH Compatibility
- Reading a Research Peptide Certificate of Analysis Before You Begin
- Frequently Asked Questions
What Reconstituting Laboratory Peptides Actually Involves
Reconstituting laboratory peptides is the process of dissolving a lyophilised powder in a suitable solvent to create a solution of known concentration for research use. Get it right and the compound dissolves cleanly, stays stable, and gives reproducible results. Get it wrong and you lose material to aggregation, contamination, or simple arithmetic errors.
This guide from VOREVIA covers the full workflow: equipment, solvent choice, the step-by-step protocol, concentration maths, storage, and troubleshooting. Each step matters because peptide research is unforgiving of shortcuts.
The core principle is simple. A freeze-dried peptide is stable because water is absent. Add water and you restart the clock on degradation. Every decision after that point either slows the clock or speeds it up.
Materials and Equipment for Aseptic Reconstitution
Assemble everything before opening any vial. A clean bench, gloves, and a clear plan prevent most contamination events.
The essentials:
- Bacteriostatic water or the specified diluent
- Appropriate syringes and needles
- Alcohol wipes and sterile gloves
- Labelled tubes for aliquoting
- A calibrated pipette or syringe for accurate volumes
- A notebook for batch and volume records
Bacteriostatic water contains benzyl alcohol as a preservative, which slows microbial growth in multi-use vials. Sterile water has no preservative and suits single-use work. Before buying, it helps to understand why sterility and endotoxin checks matter for bacteriostatic water, since HPLC purity alone says nothing about a solvent. VOREVIA supplies BAC Water 10ml for laboratory research applications.
Peptide Solubility and Solvent Selection
Solvent choice decides whether a peptide dissolves at all. Most lyophilised research peptides dissolve readily in bacteriostatic water. Some hydrophobic sequences need a small amount of acetic acid or a buffer solution first, then dilution.
Match the solvent to the peptide’s character:
- Hydrophilic peptides: bacteriostatic water usually works
- Hydrophobic peptides: consider a dilute acetic acid pre-wet
- pH-sensitive peptides: use a buffer solution at the specified pH
A common mistake is adding solvent too fast. Aim the stream at the vial wall, not the powder. Swirl gently. Never shake, because agitation drives aggregation.
A Step-by-Step Reconstitution Protocol
Follow this sequence for every vial. The total time is roughly 10 to 15 minutes, and the order matters more than the speed.
- Let the vial reach room temperature before opening. Condensation on a cold stopper draws contaminants into the puncture site.
- Wipe the stopper with an alcohol wipe and let it dry fully. A wet stopper dilutes the solvent and carries alcohol into the solution.
- Draw your calculated solvent volume into a syringe, then expel any air pocket so the graduations read true.
- Vent the vacuum-sealed vial by inserting the needle slowly. A lyophilised vial is often under partial vacuum, and a fast puncture pulls air, powder and solvent upward.
- Direct the solvent down the vial wall, not onto the powder. Aiming at the cake fractures it and traps undissolved clumps.
- Swirl gently until the powder fully dissolves. Roll the vial between gloved palms rather than shaking.
- Inspect for particles, cloudiness, or colour change against a dark background and a light source.
- Record the concentration and date on the label before the vial leaves your hand.
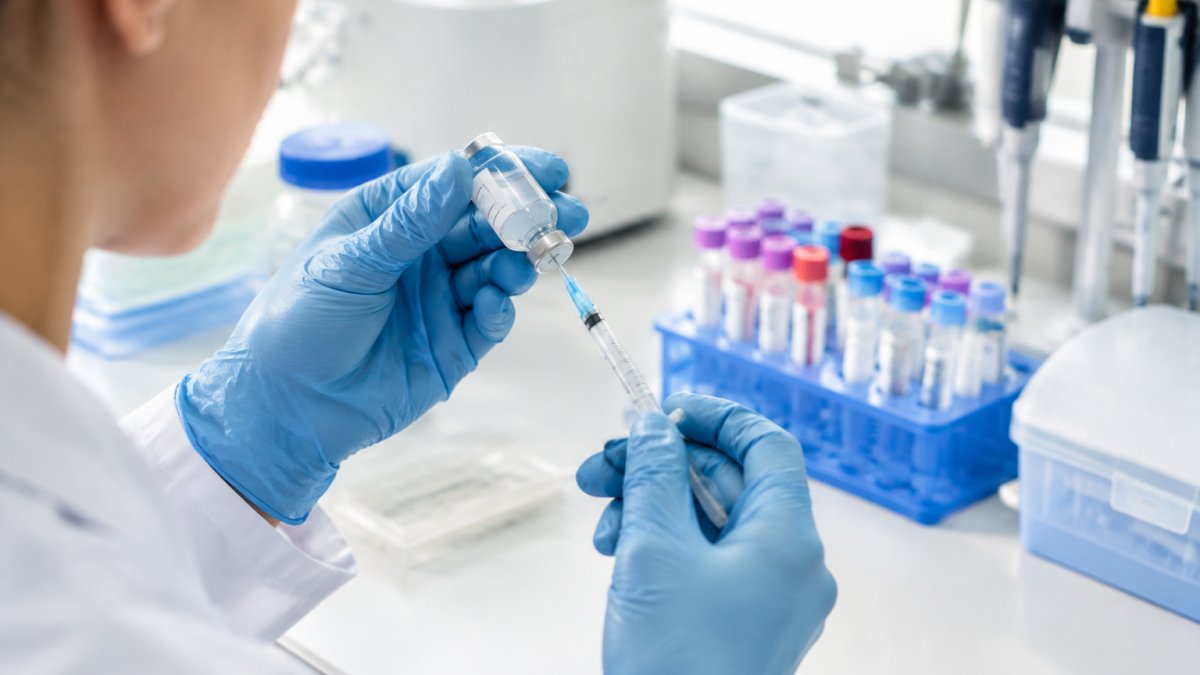
Vial anatomy and vacuum pressure. A standard lyophilised vial has three parts: the glass body, the rubber stopper, and the aluminium crimp seal. The stopper is the only sterile barrier you will puncture, so every needle entry is a contamination event. Many vials arrive under vacuum because the freeze-drying process seals them at low pressure; when you insert a needle, air rushes in and can foam the powder or blow solvent back up the needle. Venting slowly, and where possible using a needle with a filter or a venting needle, prevents this. If the vial hisses sharply on entry, the vacuum was strong, pause before injecting solvent.
Needle and syringe choice. Use the smallest gauge that will comfortably carry the solvent; a 23G to 25G needle limits coring of the stopper. For small volumes, a 1 mL syringe with 0.01 mL graduations gives far better resolution than a 5 mL syringe, where a single graduation can be 0.2 mL. That difference matters when you are measuring 1.5 mL into a 5 mg vial.
Equipment calibration. A syringe is a measuring device, and like any measuring device it can drift. Before a critical batch, verify its accuracy against a calibrated reference before relying on it.
Expected result: a clear solution with no visible particles. For a standardised approach to reproducible in vitro work, see this guide to standardising peptide reconstitution for in vitro studies.
Watch out: if the powder clings to the stopper or the vial wall after swirling, do not add more solvent to chase it, tilt and roll the vial so the existing liquid washes the sides, because topping up changes your concentration.
The protocol runs in a fixed order and takes roughly 10 to 15 minutes from start to finish.
| Step | What to do | Note |
|---|---|---|
| 1 | Let the vial reach room temperature | Condensation on a cold stopper draws in contaminants |
| 2 | Wipe the stopper with alcohol and let it dry | A wet stopper dilutes the solvent |
| 3 | Draw the calculated solvent volume and expel air | Graduations then read true |
| 4 | Vent the vacuum-sealed vial slowly | A fast puncture pulls air and powder upward |
| 5 | Direct solvent down the vial wall | Aiming at the cake traps undissolved clumps |
| 6 | Swirl gently until fully dissolved | Roll between gloved palms, never shake |
| 7 | Inspect against dark background and light | Check for particles, cloudiness or colour change |
| 8 | Record concentration and date on the label | Do this before the vial leaves your hand |
Using a Peptide Reconstitution Calculator
A peptide reconstitution calculator converts milligrams of powder and millilitres of solvent into a working concentration in mg/mL. The formula is simple: concentration equals mass divided by volume.
For example, 5 mg of powder in 2.5 mL of solvent gives 2 mg/mL, or 2000 micrograms per mL. A calculator removes arithmetic slips that quietly ruin a whole batch.
Watch out: mixing units is the single most common error here. Milligrams and micrograms do not convert by eye. Write both values down before you draw anything.
Research Peptide Storage Guidelines After Reconstitution
Reconstituted peptides are less stable than the lyophilised powder. Store solutions refrigerated, protected from light, and use them within the timeframe the supplier’s documentation supports. Freeze aliquots only where the peptide tolerates freezing.
Practical rules:
- Aliquot to avoid repeated freeze-thaw cycles
- Keep vials upright and capped
- Label every aliquot with batch and date
- Log storage temperature
Storage conditions are product-specific, not universal. Lyophilised peptide stability explains why conditions must be set per compound rather than assumed.
Troubleshooting Cloudy Solutions and pH Compatibility
Cloudiness is a signal, not a verdict. Most guides stop at “discard and start again”; the useful work is diagnosing which of four mechanisms is responsible, because three of them are recoverable and one is not.
Incomplete dissolution. The powder is still present as fine particles rather than in solution. Swirl longer, never shake, and give the vial time at room temperature. A hydrophobic sequence may need a dilute acetic acid pre-wet before the main solvent is added.
Aggregation. Peptides with hydrophobic regions can self-associate into fibrils or amorphous aggregates, which scatter light and read as cloudiness. Aggregation is driven by concentration, agitation, temperature and interfaces.
pH mismatch. This is the cause most often missed. Every peptide has a pH range in which it is soluble and stable, and a solution outside that range can precipitate even when everything else was done correctly. Check the supplier’s documentation for the stated buffer before assuming the peptide is faulty.
Contamination. Microbial growth or foreign particulates produce turbidity that does not clear on swirling. This is the non-recoverable case: discard the vial, do not filter and reuse it for quantitative work, and review your aseptic technique before opening the next one.
pH balance and buffer compatibility. Advanced work often needs a defined buffer rather than plain bacteriostatic water. Phosphate buffers suit many peptides but can promote aggregation with some sequences; acetate buffers suit acidic peptides; Tris is common but its pH drifts with temperature. Match the buffer to the peptide’s stated requirements, prepare it at the correct molarity, and check pH with a calibrated meter rather than indicator paper. Never adjust pH by guesswork, add buffer, mix, and re-measure. A peptide held outside its stable pH range degrades quietly, so a solution that looks clear can still be failing.
Reading a Research Peptide Certificate of Analysis Before You Begin
The certificate of analysis is your batch record. Read it before reconstituting, not after. Check identity, purity, and the analytical methods used.
What to confirm:
- Batch number matches the vial
- Purity and identity test results are present
- Methods are named, not just results
- The document is batch-specific, not generic
A practical batch-specific COA checklist makes this quick. VOREVIA supplies research peptides with batch-specific documentation and independent analytical verification, so each vial can be traced to its data.
Frequently Asked Questions
What does reconstituting a research peptide mean?
Reconstitution is the process of adding a solvent, usually bacteriostatic water or sterile water, to a lyophilised (freeze-dried) peptide powder so it dissolves into a measurable liquid. The powder is stable for long periods in its dry form, but once dissolved the peptide becomes vulnerable to degradation, so reconstitution is a point of no return for shelf life. Getting the solvent volume and sterile technique right at this stage determines whether your later measurements mean anything.
How can researchers calculate peptide concentration after reconstitution?
Divide the total mass of peptide in the vial by the volume of solvent added. A 10 mg vial reconstituted with 2 mL of diluent gives 5 mg/mL, which equals 5,000 µg/mL. A peptide reconstitution calculator removes the arithmetic risk, particularly when you are working with smaller masses or unusual volumes. Always record the mass, the diluent volume and the resulting mg/mL figure in your lab notebook so a colleague can reproduce the preparation exactly.
What records should be kept when preparing a peptide for research?
Log the batch number from the vial label, the research peptide certificate of analysis reference, the diluent type and volume, the date and time of reconstitution, and the calculated concentration. Note the storage location and any aliquoting performed. These records let you trace an anomalous result back to a specific batch or preparation step, which is the difference between a troubleshootable experiment and an unexplained one.
What factors can affect peptide stability after reconstitution?
Temperature, light exposure, repeated freeze-thaw cycles, pH of the diluent and microbial contamination all shorten usable life. Most reconstituted peptides are best kept refrigerated at 2-8°C and protected from light, with aliquoting to avoid repeated warming. Bacteriostatic water containing benzyl alcohol slows microbial growth but is not suitable for every assay, so check compatibility before choosing your solvent.
Reconstitution rewards preparation and punishes improvisation. Accuracy in volume, solvent choice, and storage is what separates reproducible results from wasted material. VOREVIA supports that discipline with independently verified peptides, batch-specific documentation, and UK-based stock, alongside a carefully selected research catalogue. Get started with VOREVIA and shop the research collection with confidence in every batch.
